
RAM Power Wagon – Overland Build
A Power Wagon With Gear Organized in Two Places
This RAM Power Wagon build uses the bed walls for recovery and camp equipment, while the space behind the front seats carries a separate storage and electrical installation. The workshop photos show the mounting panels, rear-cabin platform, and equipment during assembly.
The gallery is a record of this particular layout. Use it to compare where gear sits and how it can be reached, then discuss the dimensions and mounting requirements for your own truck.
Vehicle: RAM Power Wagon
Bed Layout: Wall-mounted equipment and upper rack
Rear Cabin: Cargo platform and electrical installation
Photo Record: Workshop installation and equipped views

The Power Wagon in the shop, with its upper bed rack visible behind the cab.
Use the Bed Walls for Equipment Mounting
The bed photos show perforated mounting panels along both sides. Recovery boards attach to one panel, while a small propane cylinder mounts on the opposite side. Other views show the spare tire and the remaining space between those locations.
When planning a similar layout, start with the size of each item and the mounts it requires. Check the tailgate opening, the space below your rack, and the bed-floor area you want available for larger cargo.

The bed-wall panels with recovery equipment, a mounted cylinder, and the spare tire visible.

The rear-cabin platform and storage installation viewed through an open rear door.
Create a Cargo Area Behind the Front Seats
The rear-cabin photos show the passenger-seat area converted into a metal cargo platform with storage compartments. A back-wall panel provides additional mounting space behind it.
This arrangement trades rear seating space for cargo. Decide how many passengers you need to carry before planning an installation, then check the full travel of the front seats and access through the rear doors.
Keep Access to the Equipment Below the Platform
A close-up shows an access panel lifted out of the cargo platform. Other photos show wiring and electrical components beneath and behind the installation, along with a small monitor mounted above it.
Access matters after the gear is packed. Plan how you will reach the components that need service, and keep wiring clear of lids, storage compartments, and other moving parts. The photos do not establish the battery capacity, charging specification, or electrical runtime.

An access panel lifted from the rear-cabin cargo platform.
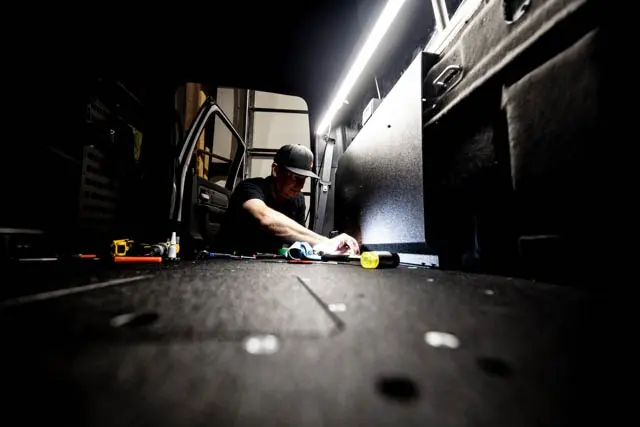
Work in progress on the rear-cabin installation, before the area was fully assembled.
Give the Installation Room to Come Together
The shop sequence includes the back wall exposed, panels being fitted, and the completed platform. A separate image shows a compressor mounted to a perforated panel before installation.
These views help explain how the interior space was used. They do not establish that the photographed panels are a current retail kit for every Power Wagon. Share your model year, cab configuration, and measurements with AAL before choosing parts for a similar project.
Questions About This Power Wagon Layout
Does This Setup Keep the Rear Passenger Seats?
The photographed rear-cabin installation uses that seating space for cargo. Plan around your passenger needs before copying this layout.
Can I Order Every Panel Shown as a Complete Kit?
This page documents an individual installation. Ask AAL about current products and fitment for your exact truck rather than treating the photos as a complete orderable package.
What Electrical System Is Installed?
The photos show an electrical installation and monitor, but the original page does not identify a complete component specification. Confirm the batteries, charging equipment, wiring, and circuit protection for your own needs.
What Should I Include in a Build Question?
Use the questions button above the main photo. Include your truck’s model year, cab and bed dimensions, passenger needs, existing rack, and the equipment you want to mount.
RAM Power Wagon Installation Photo Gallery


