


Jeep JL ARB Compressor Remote Kit
Fitment: Jeep Wrangler JLU - 4-Door
From: $189.95
Note: Product photos may contain optional components.
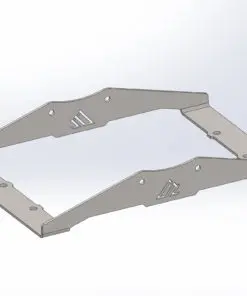
Jeep JL ARB Compressor Remote Kit
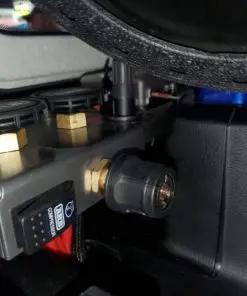
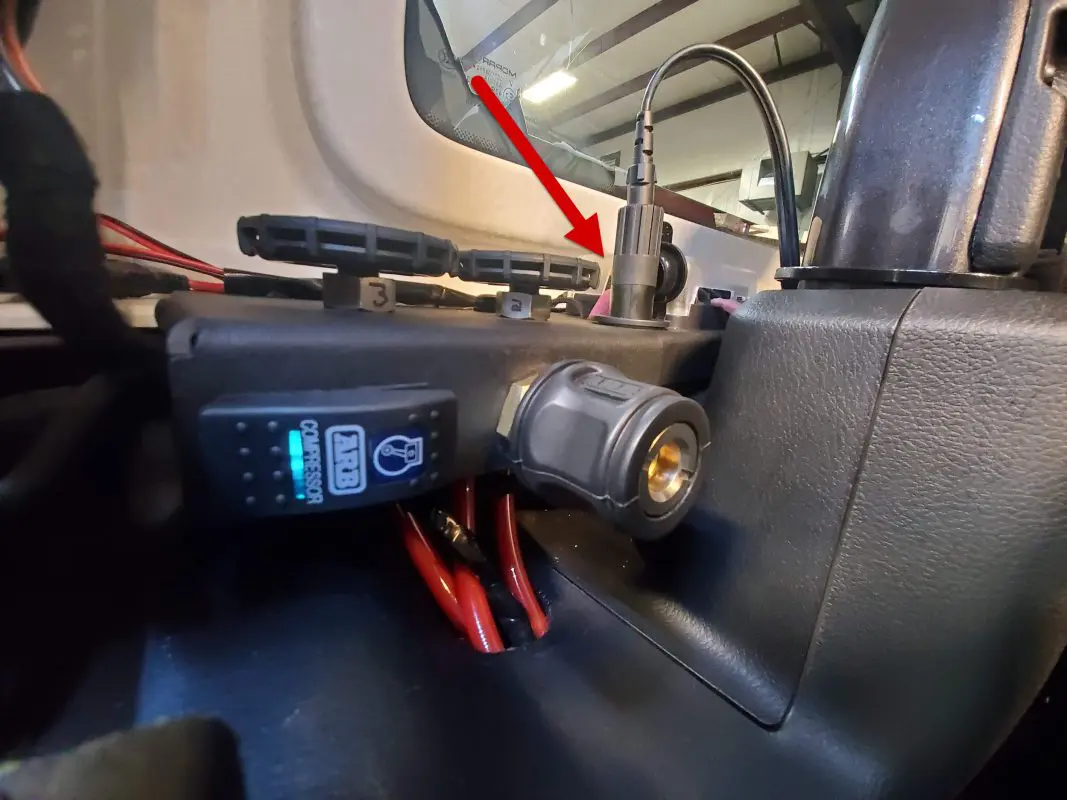
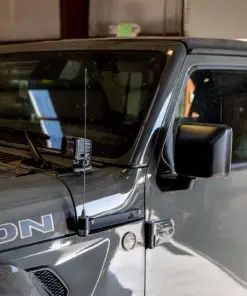
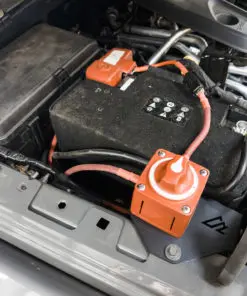
Get fast, convenient access to your on-board air with our Jeep JL ARB Compressor Remote Kit. This kit relocates your air connection to an easy-to-reach spot so you can air up or run tools without digging into the engine bay. Designed around the Jeep Wrangler JL platform, it integrates cleanly with popular ARB onboard compressor setups and keeps your system tidy, reliable, and trail ready.Why Choose This Remote Kit
- Quick connections – Move your air chuck to a convenient location for faster tire service on the trail or at the shop.
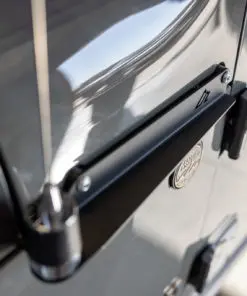
- Clean, OEM-like install – Low-profile components and a purposeful layout help maintain a factory look.
- Durable components – Quality fittings, hose, and hardware built to handle frequent use in harsh off-road conditions.
- Optimized for the JL – Cable and hose lengths, mounting options, and routing recommendations are tailored for Jeep Wrangler JL models.
What This Kit Does
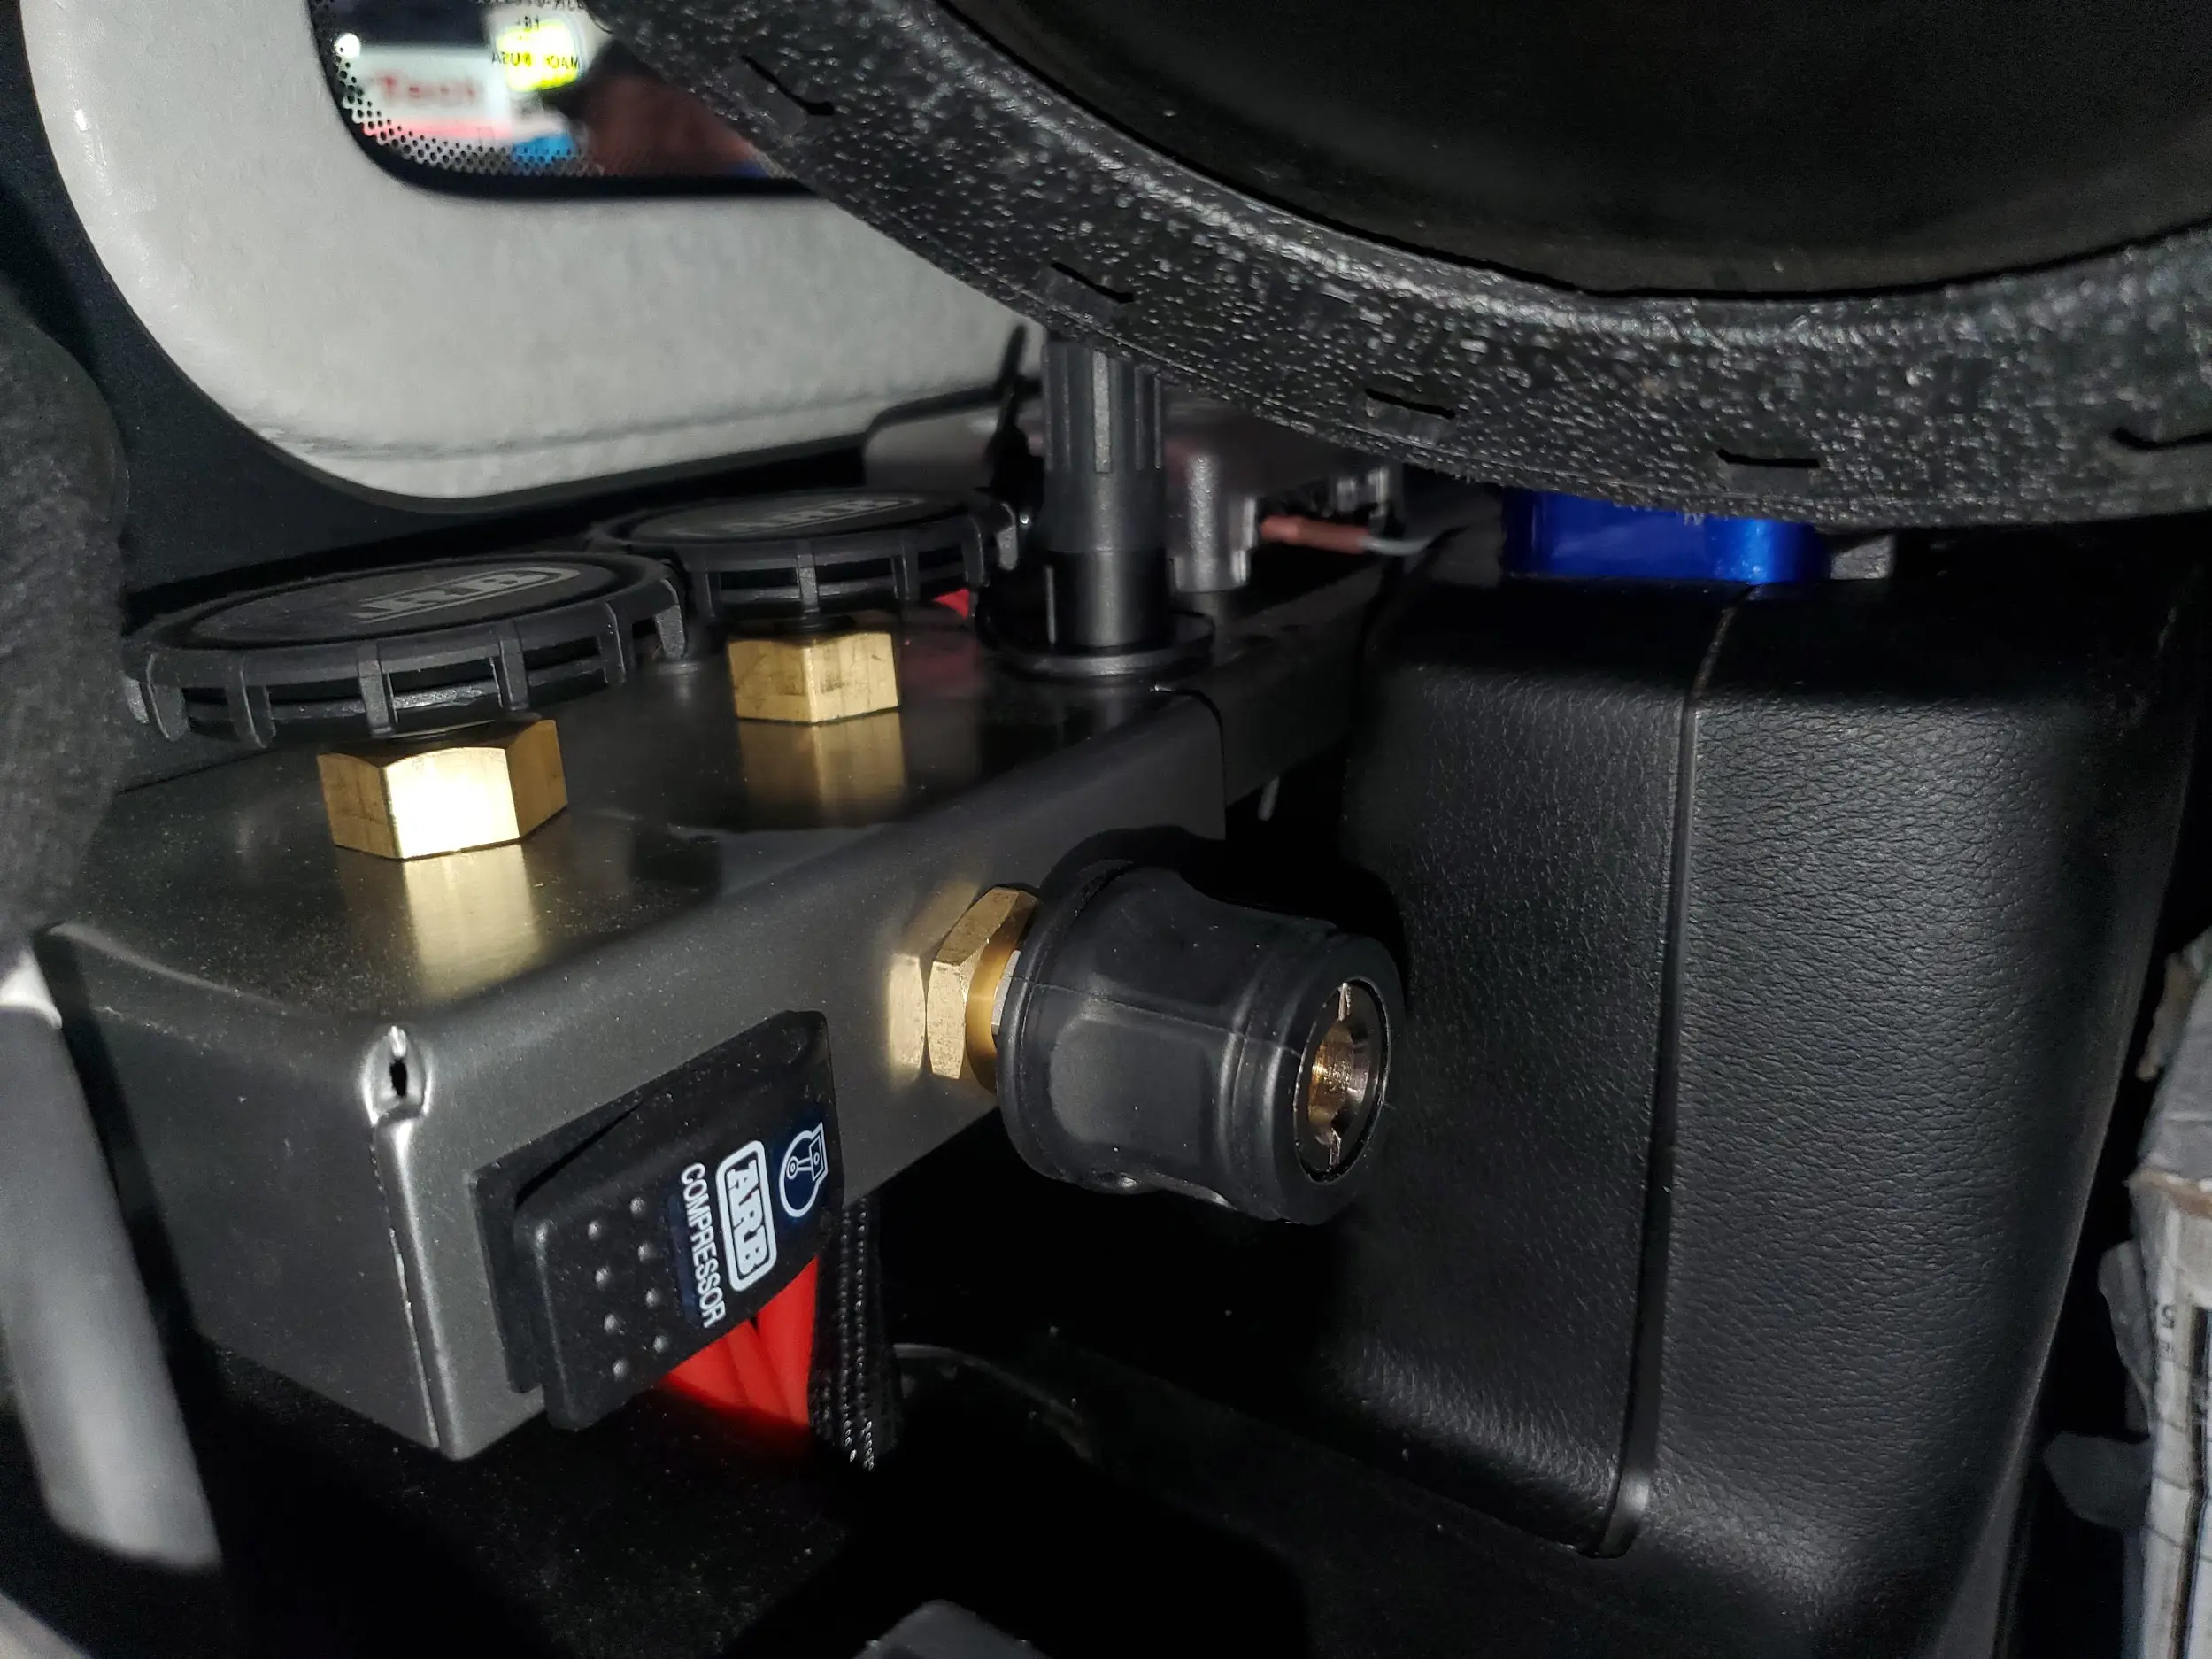
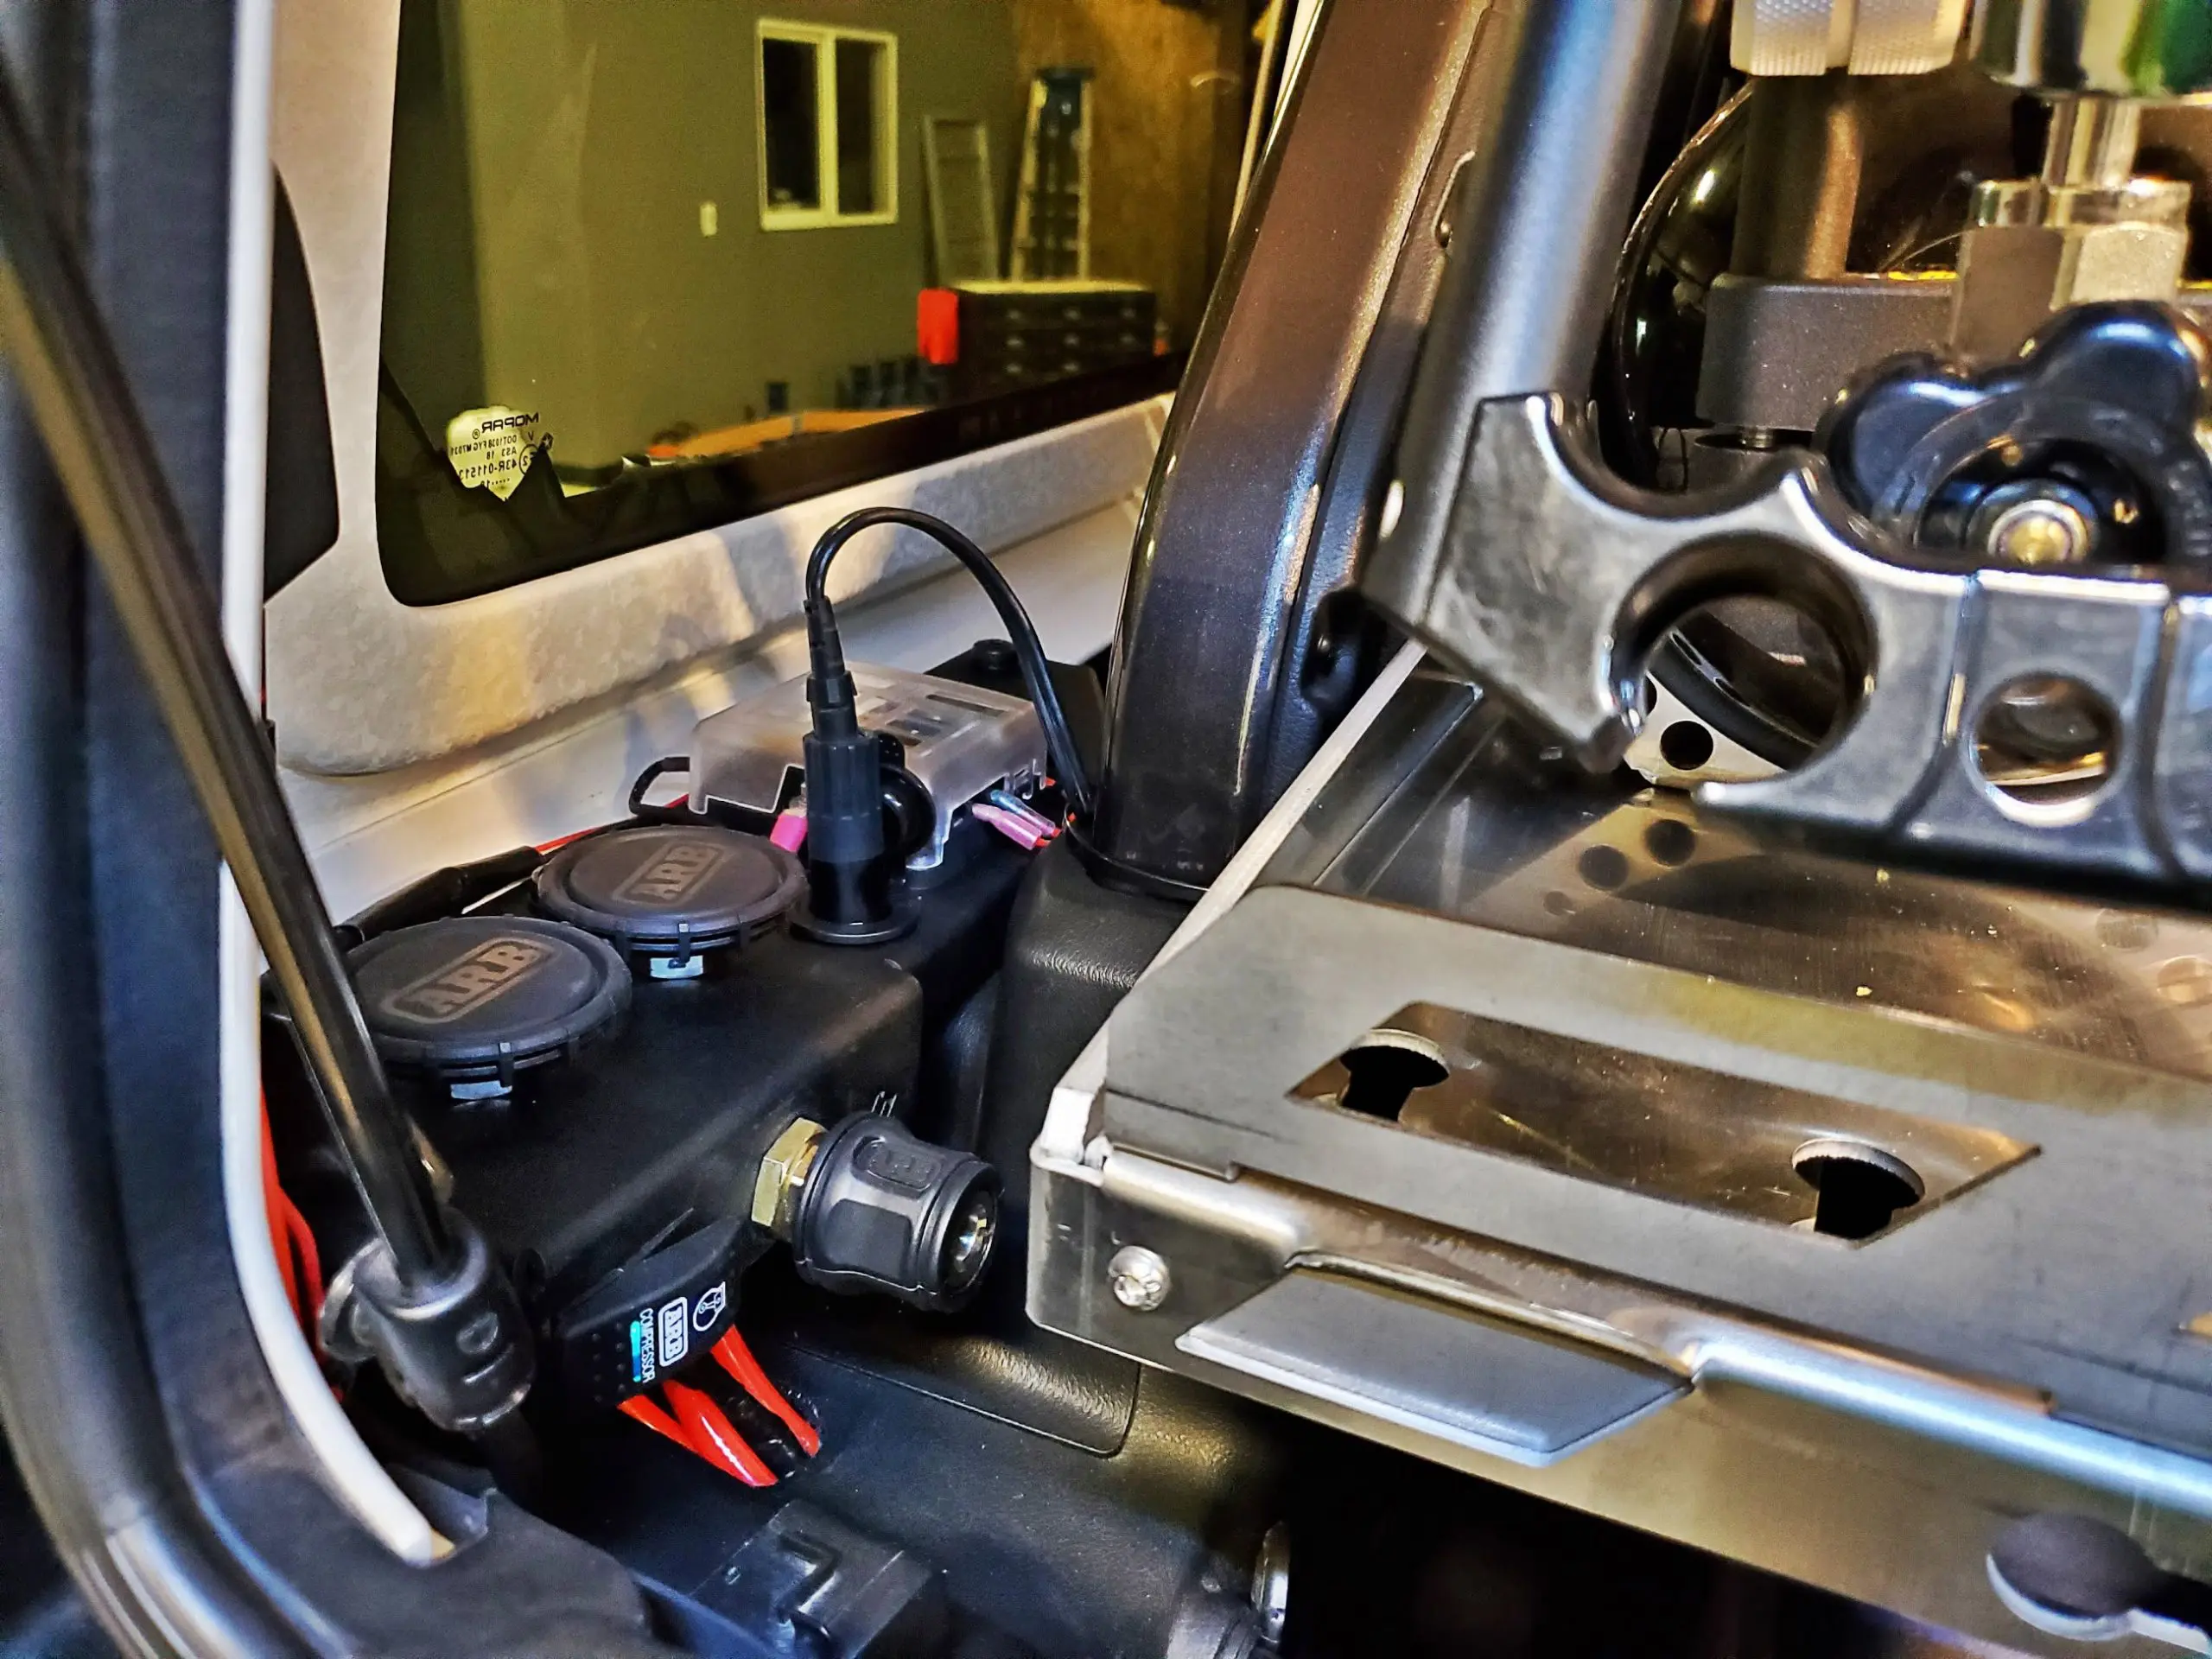
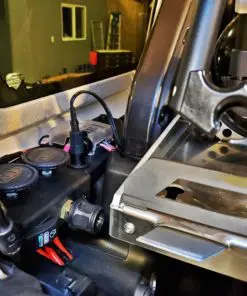
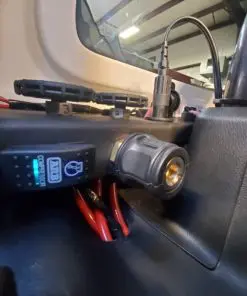
The remote kit brings your compressor output to a convenient location and allows you to switch the system on and off without opening the hood. Depending on configuration, it can:- Route compressor output to a bulkhead air fitting for easy hose hookup.
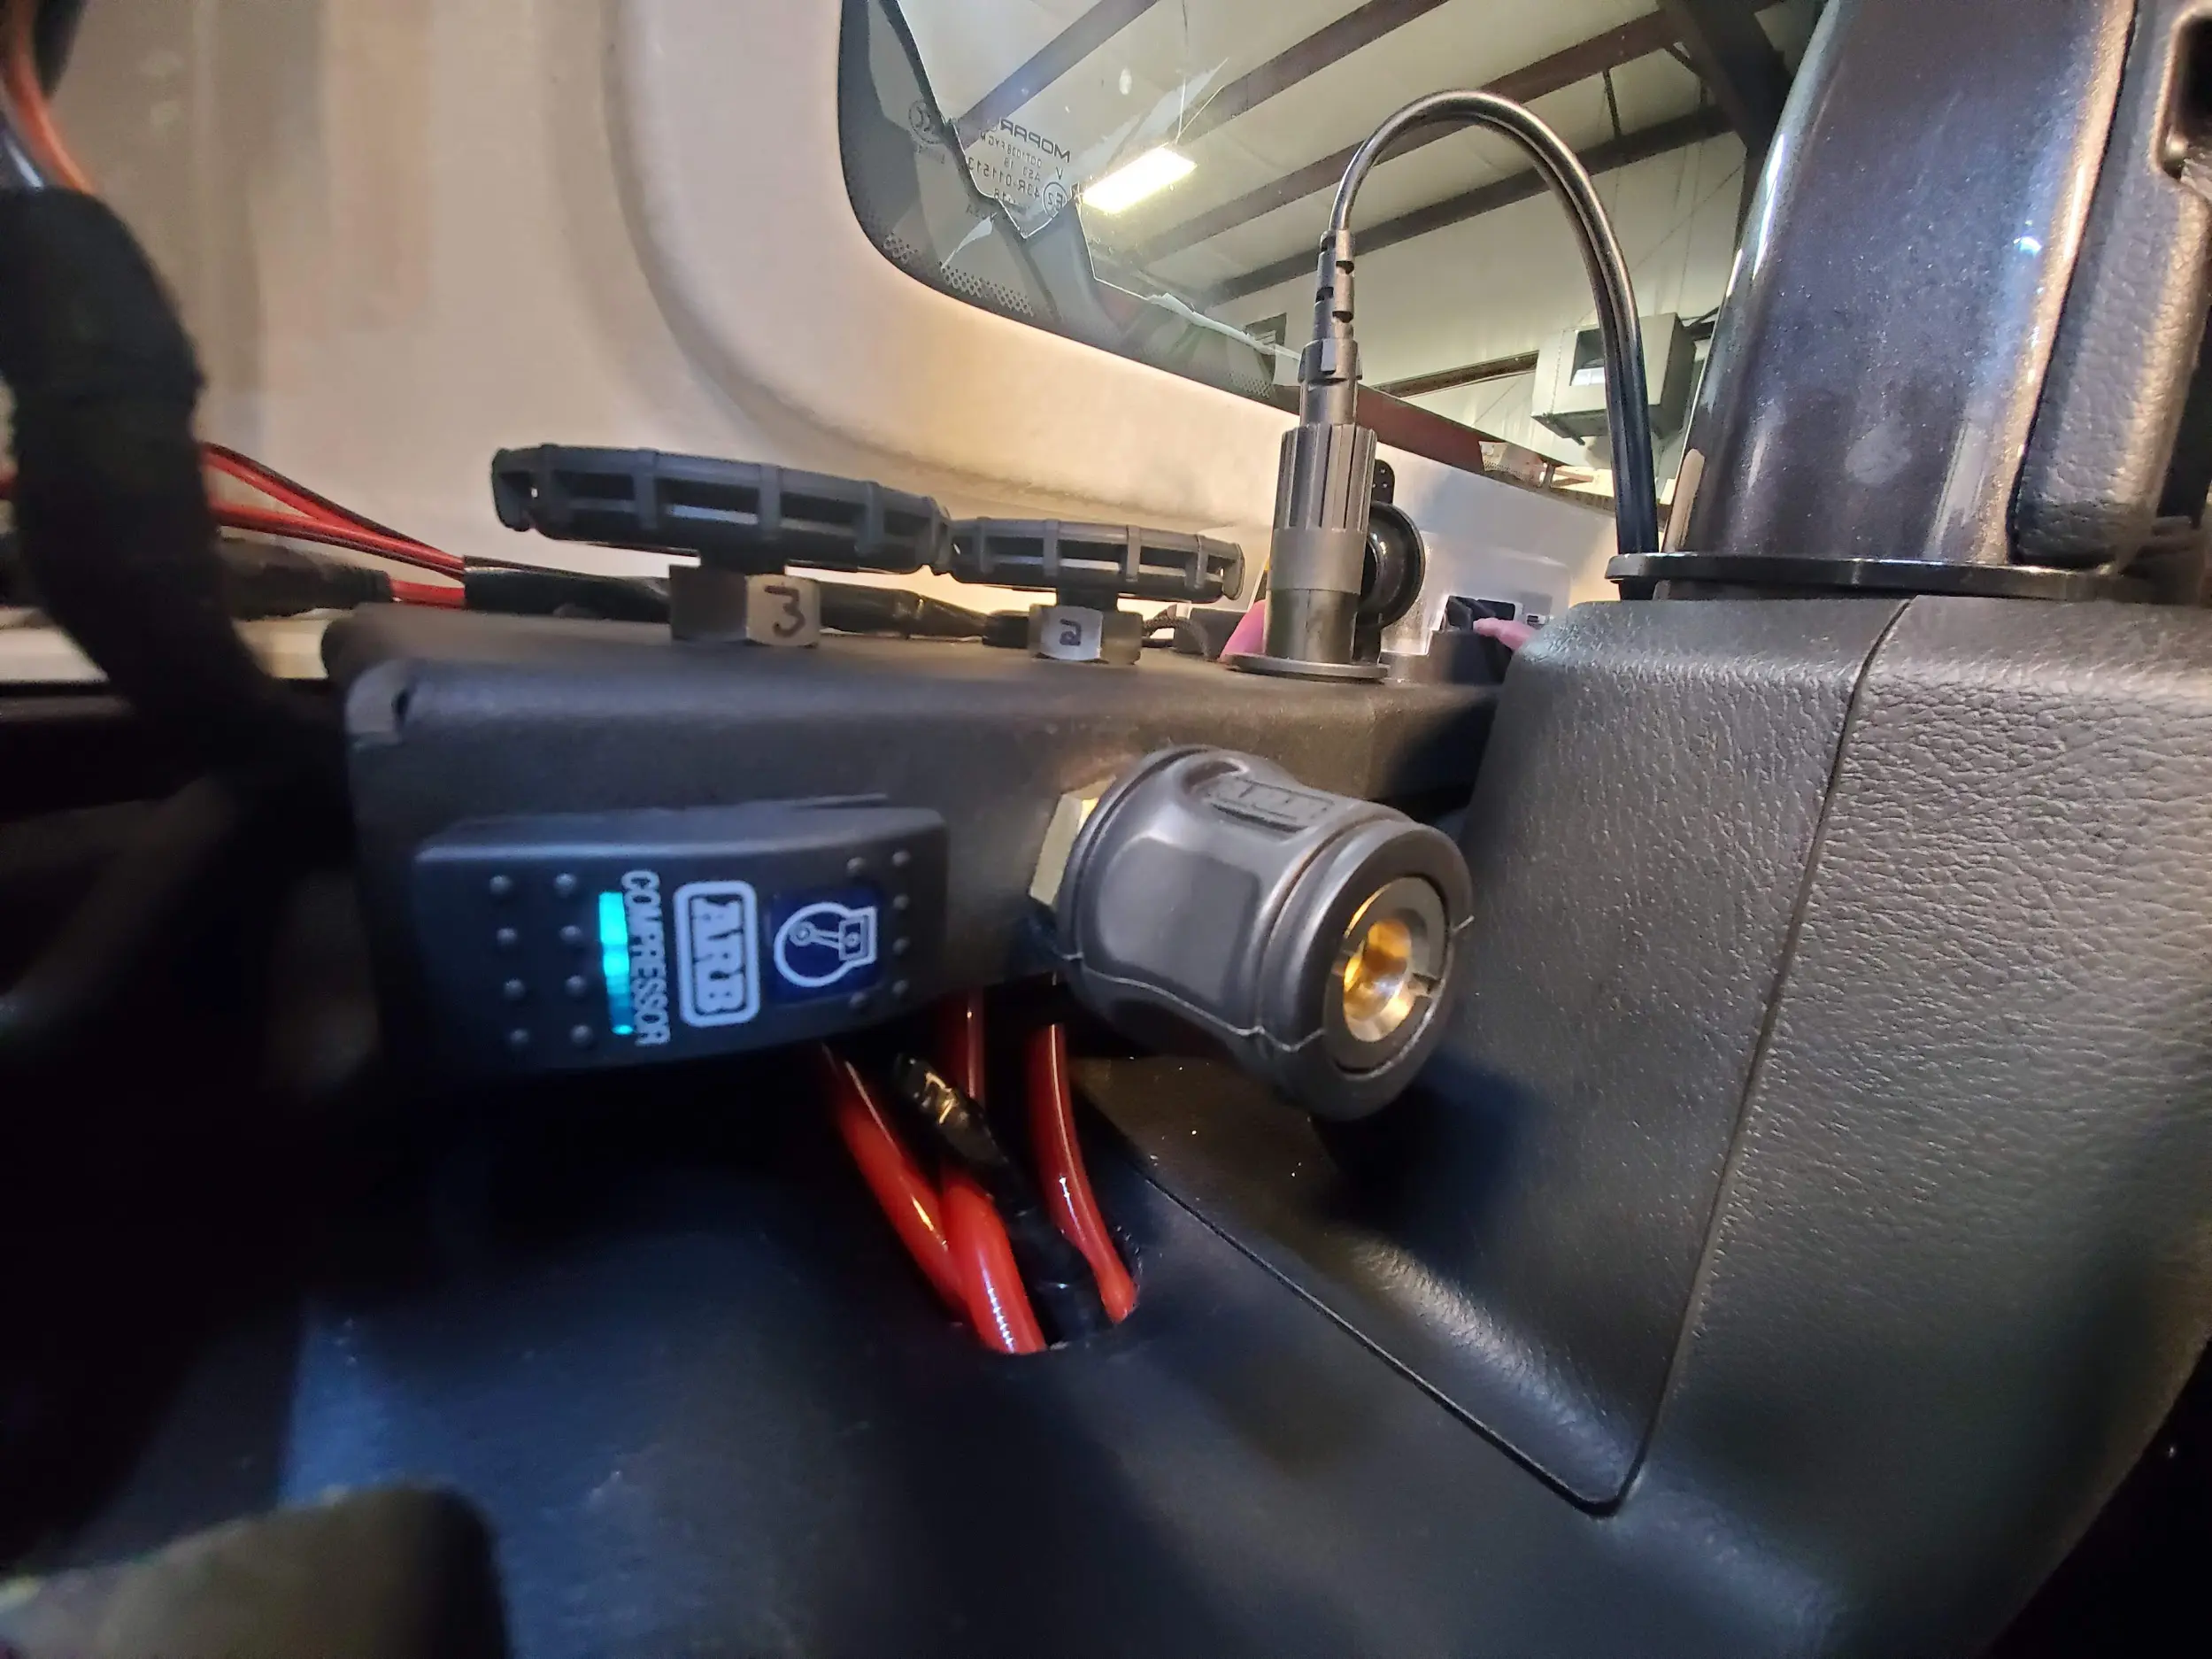
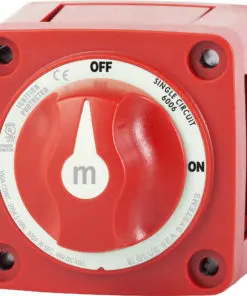
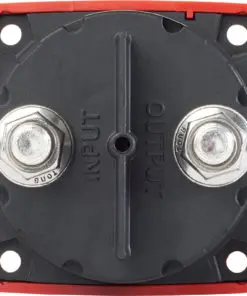
- Provide a clean location for your compressor switch so you can power the system on quickly.
- Reduce heat and abrasion exposure by using protected routing paths inside the JL.
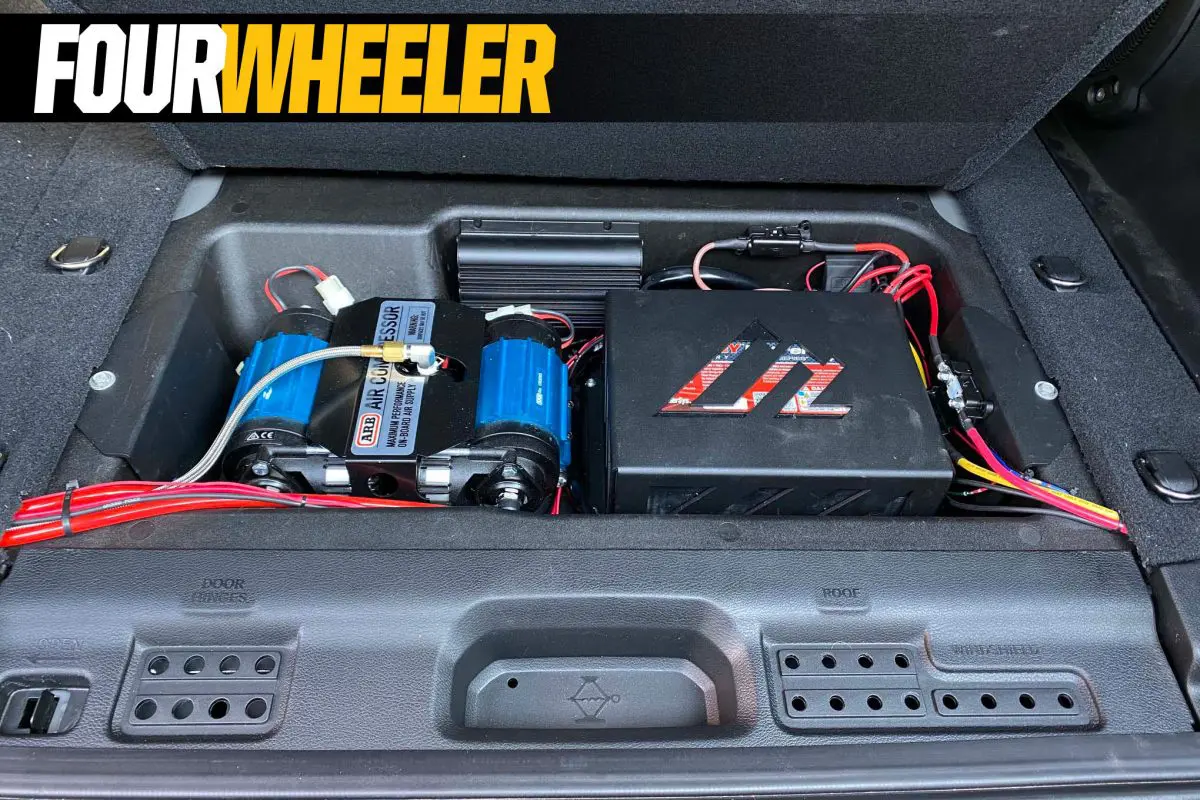
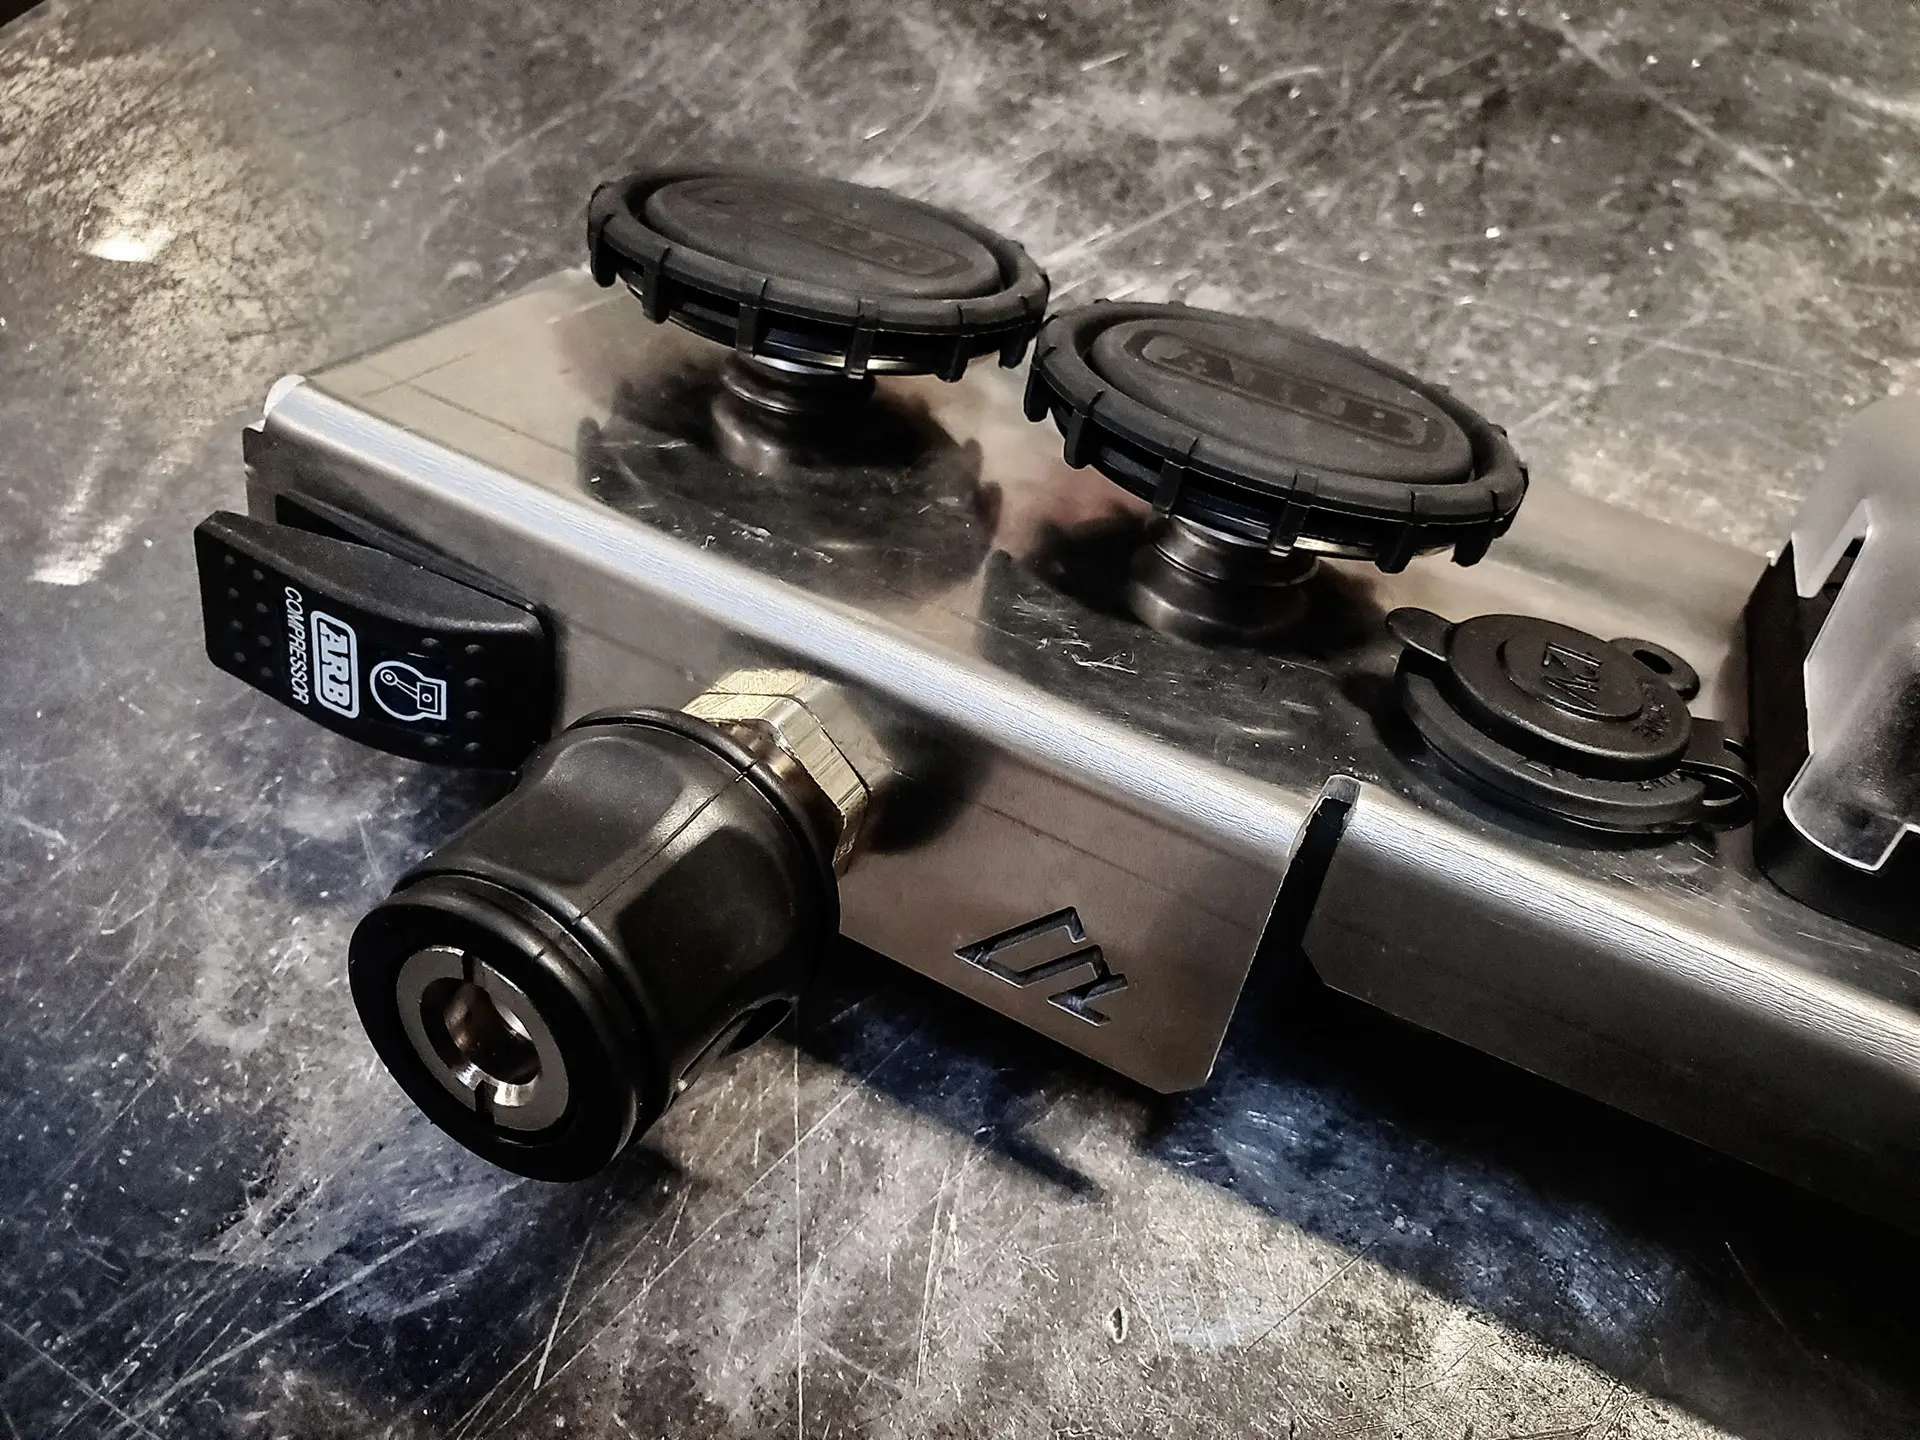
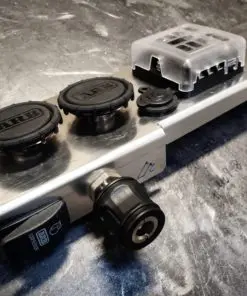
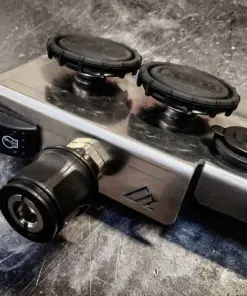
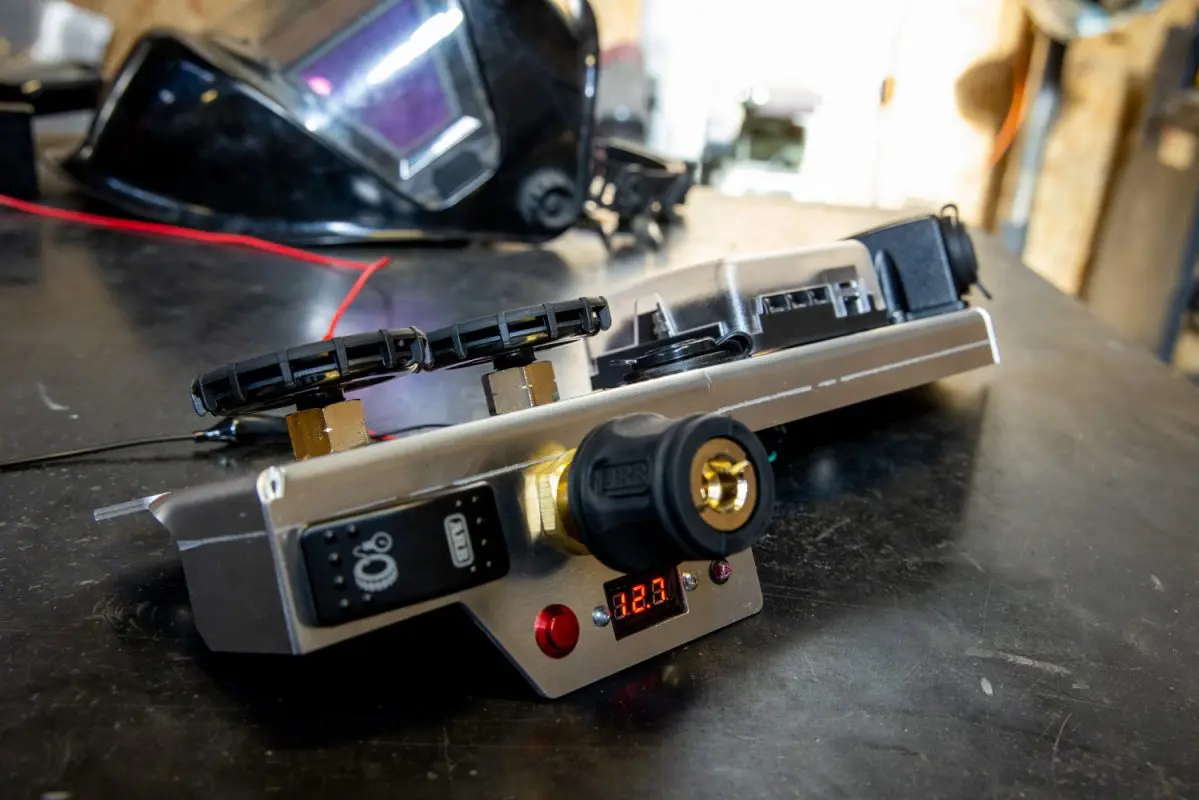
- NOTE: The photos show the filters and switch from the ARB Dual Compressor Kit. Those are not included in this product; they come with the compressor.
Compatibility
- Vehicle – Jeep Wrangler JL 2-door and 4-door models (prior to 2024).
- Compressors – Works with common ARB onboard compressor setups. Check the options on this page to select the configuration that matches your compressor and switch style.
- Air lines – Standard 1/4 in NPT style fittings are typical. Verify your line and coupler spec before ordering.
- NOTE: This will not fit with the sky top one touch without modification to the bracket and to the sky top one touch.
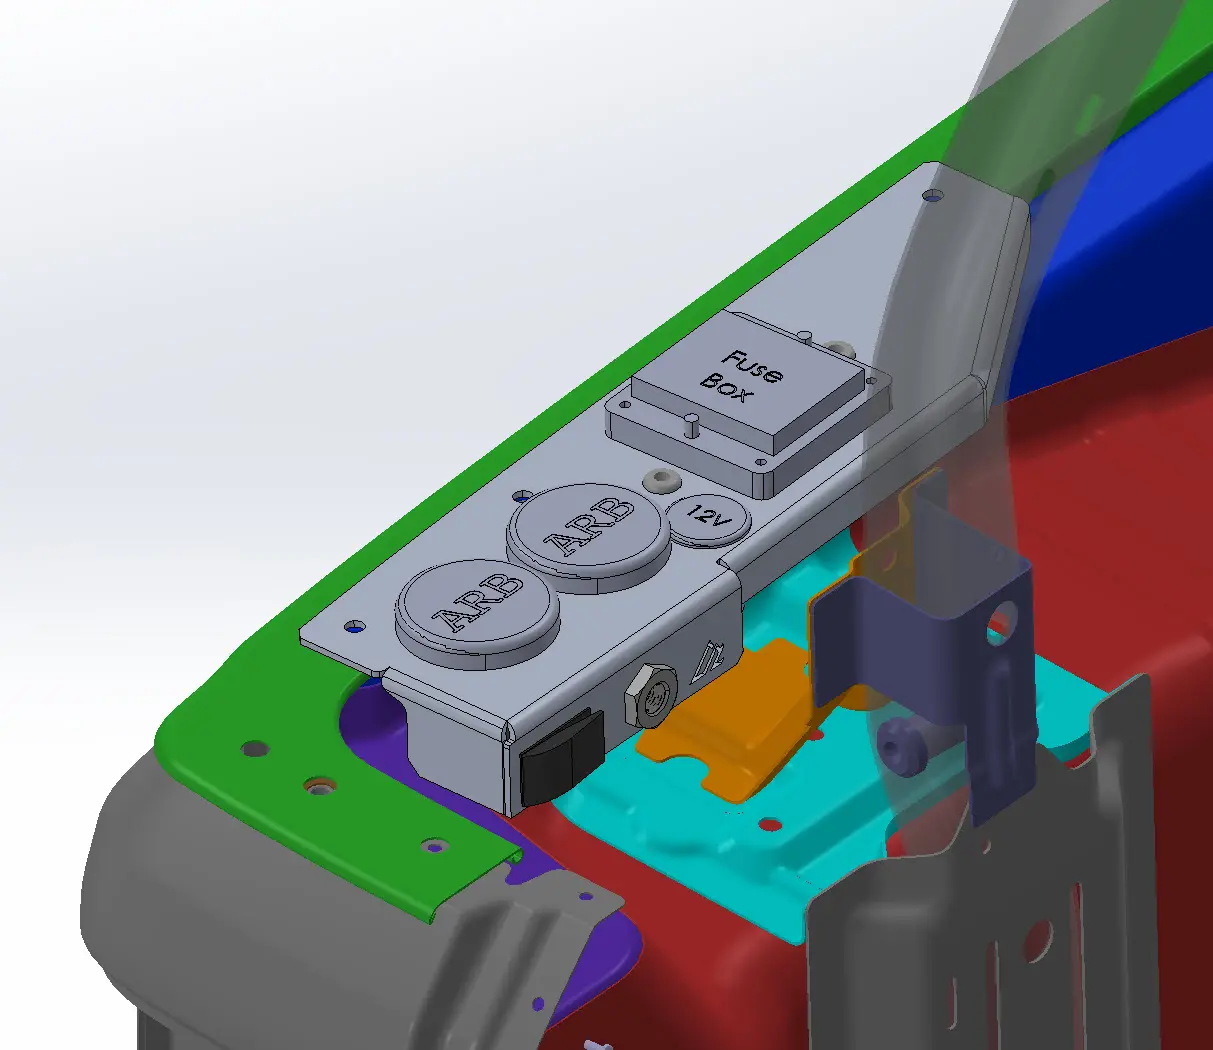
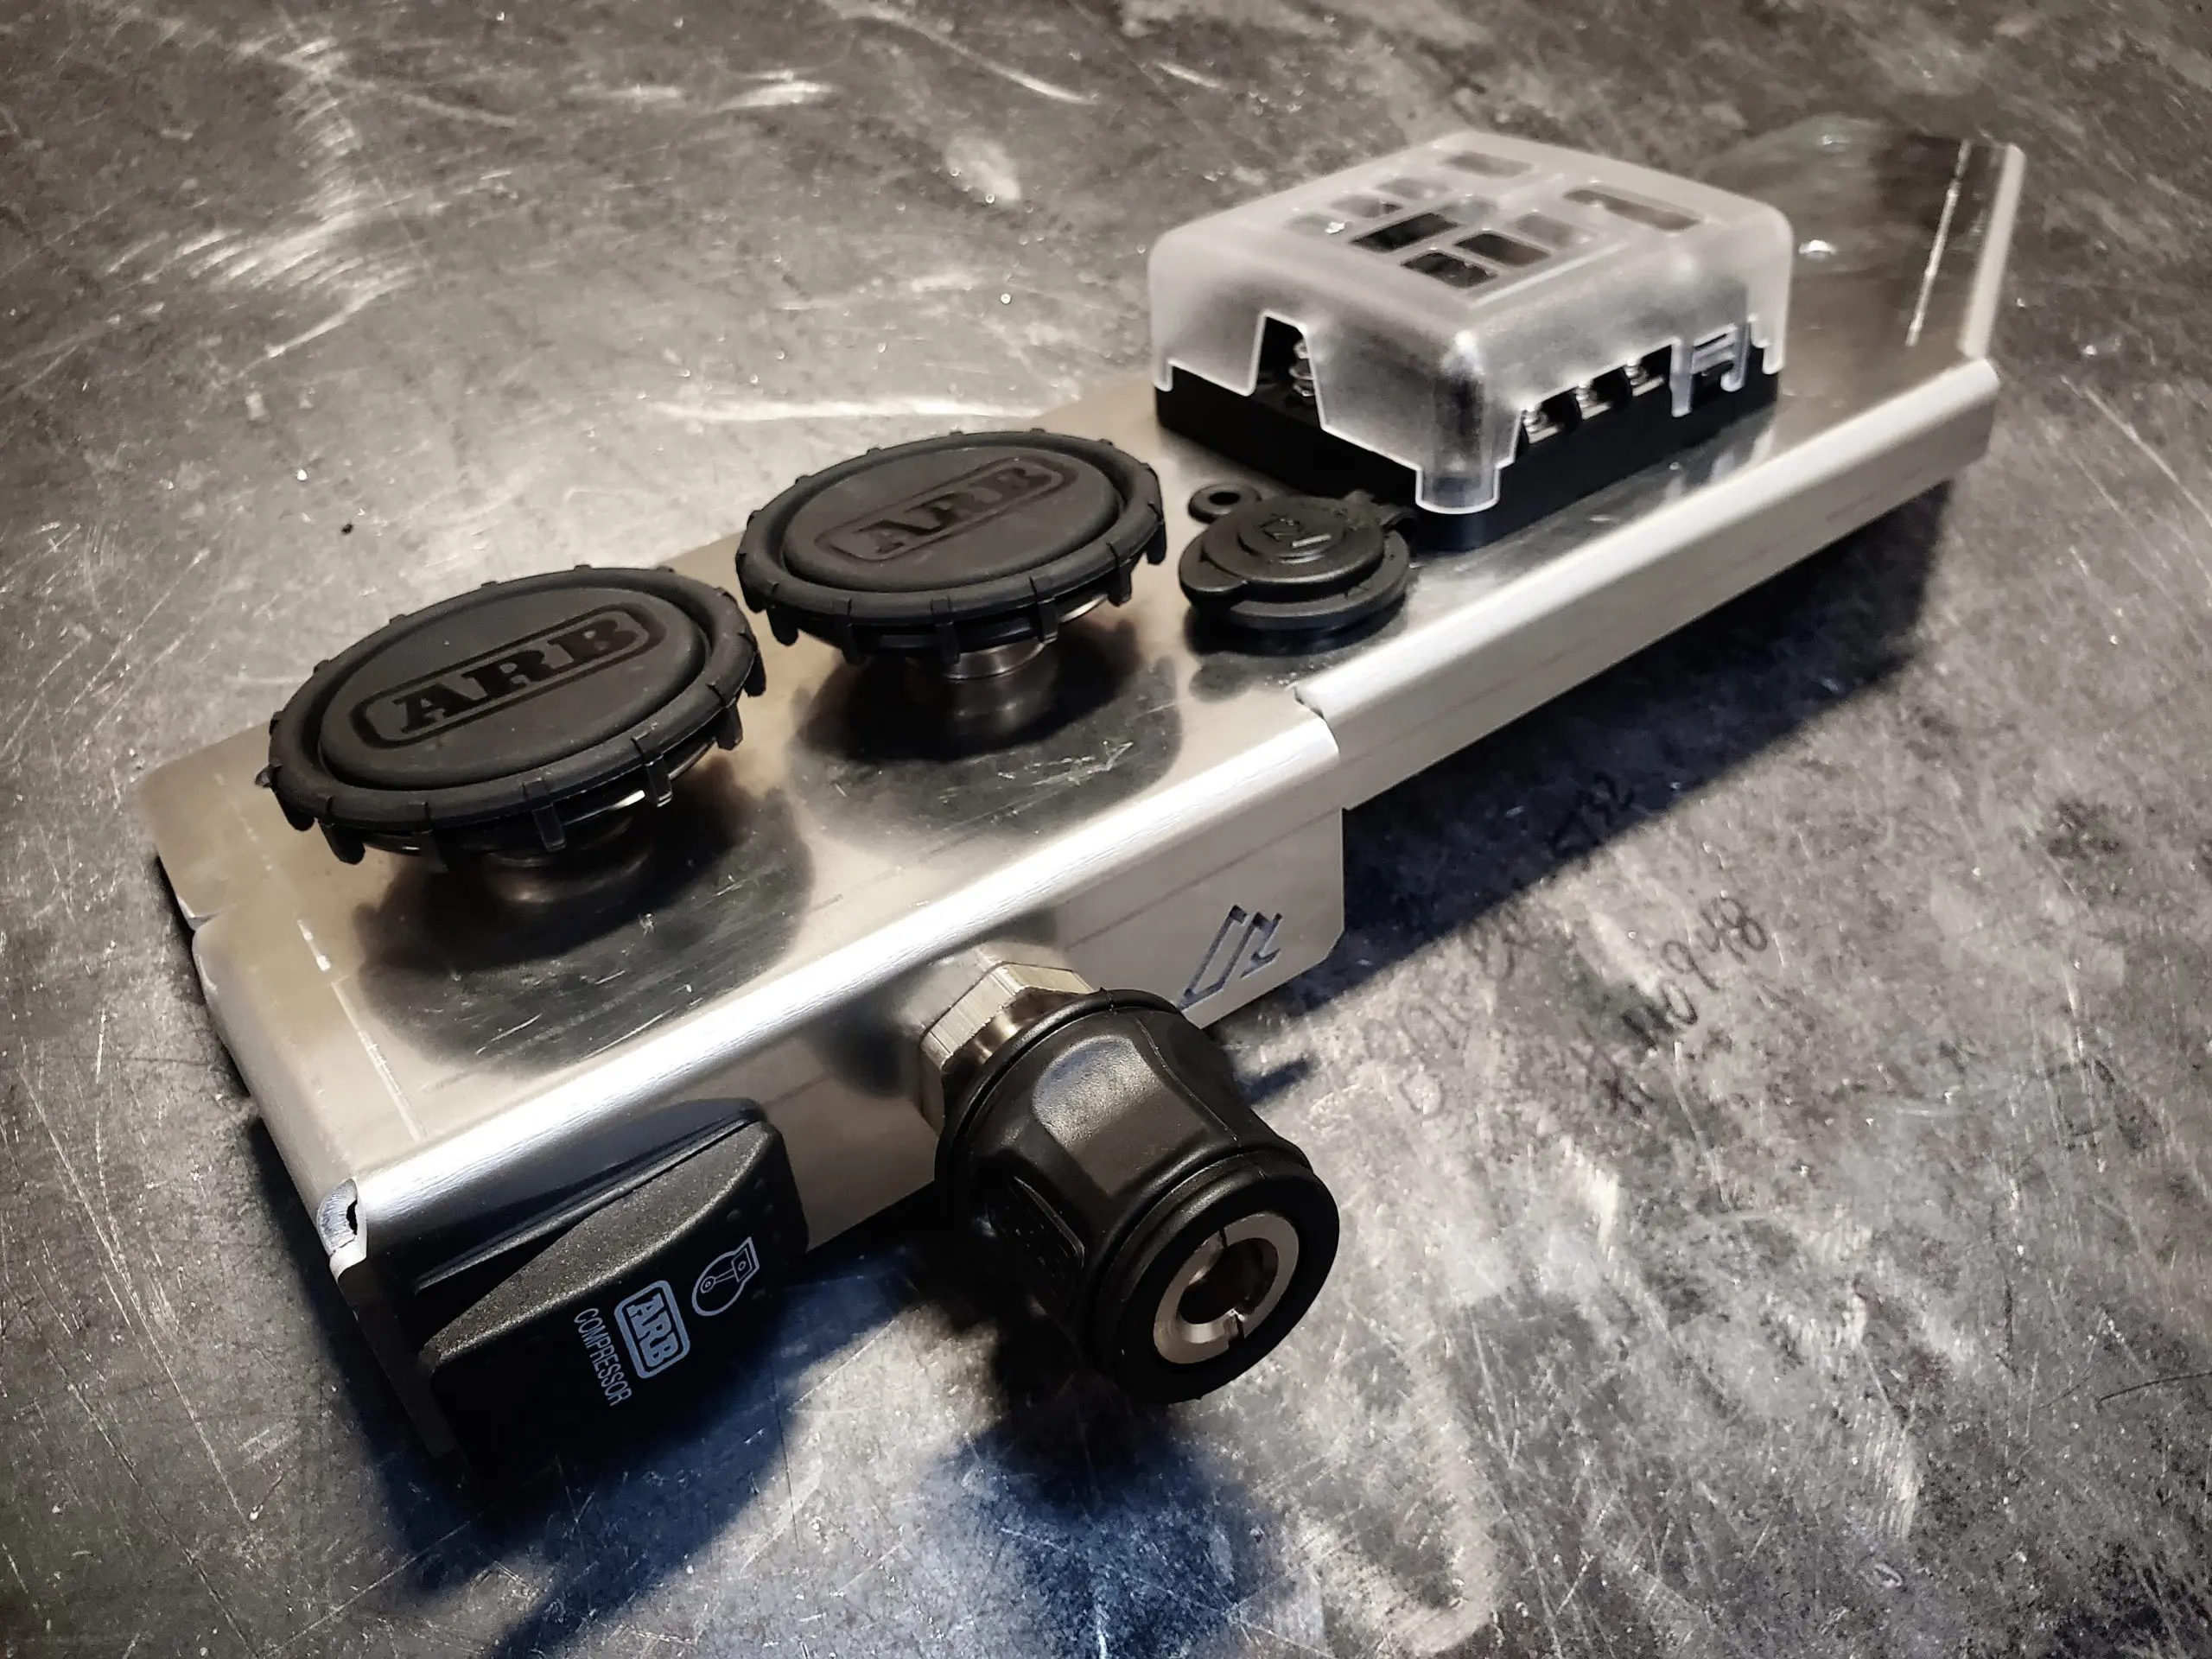
What’s Included
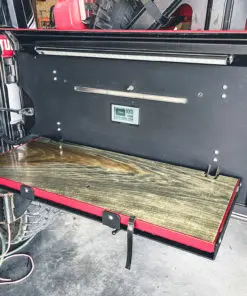
Contents vary by the options you choose. A typical Jeep JL ARB Compressor Remote Kit configuration may include:- Bulkhead air fitting and quick-connect coupler with dust cap.
- High-quality hose and fittings for compressor-to-bulkhead routing.
- Switch lead or extension harness for convenient compressor control.
- Vehicle-specific hardware and install notes for a clean JL install.
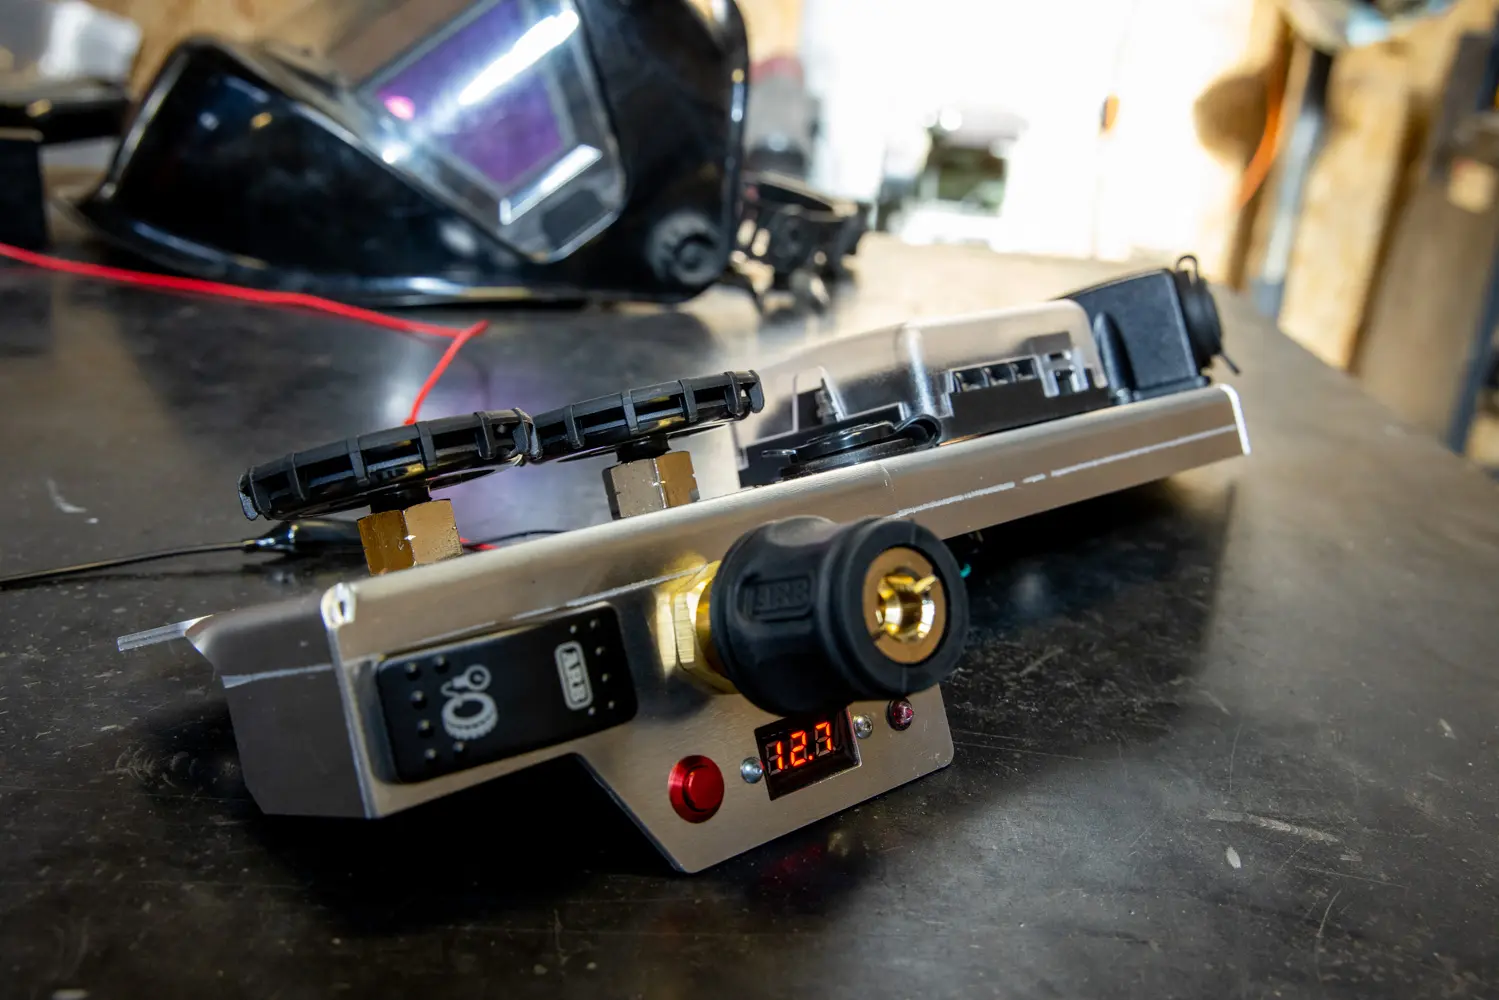
Without Voltmeter Kit includes:
- 1 Braided Hose
- 2 Black Air Hoses
- 2 90 Degree Fittings
- 2 Straight Fittings
- 1 Brass Bulkhead
- 1 Coupler
- 1 12V Flat Socket
With Voltmeter Kit includes:
- 1 Braided Hose
- 2 Black Air Hoses
- 2 90 Degree Fittings
- 2 Straight Fittings
- 1 Brass Bulkhead
- 1 Coupler
- 1 12V Flat Socket
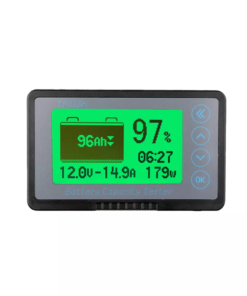
- 1 Voltmeter
- 1 Red light button
Installation Notes
- Basic hand tools required. Allow time for careful line routing and secure fastening away from heat and abrasion.
- Use thread sealant on NPT fittings and perform a leak check after assembly.
- If adding a new switch location, confirm clearance and wiring path prior to drilling.
Use Cases
- Rapid tire air-up after trail runs.
- Quick connection for blow-off nozzles and small pneumatic tools.
- Cleaner engine bay and easier service access.
Helpful Tips
- Plan your routing path before cutting hose to length.
- Keep bends gentle and avoid sharp edges to extend hose life.
- After installation, cycle the system and check for leaks at each fitting.

Important Powder Coating Note
Powder coating is a manual process done by humans. When you purchase powder coated products from AAL, we coat them for your order. Occasionally, that means delays with non-standard colors, resprays for less-than-perfect conditions, etc. We have a very high standard with powder coated products. We will work to get your parts coated in the best condition possible before they leave the building. Please visit our Powder Coating Page for colors that resemble OEM Jeep JL paint colors.
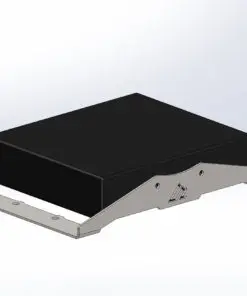
Maximum Space Efficiency
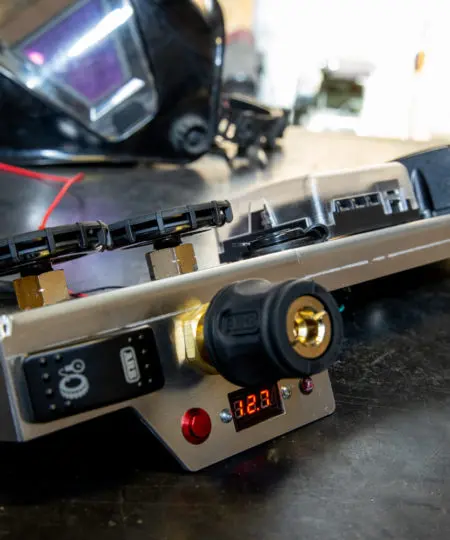
In an effort to give you as much integration possible with the charging components and auxiliary battery, we have added a new option for our remote bracket. The new option adds a built-in voltmeter and remote status LED for the Redarc BCDC 1225. That makes adding these new components a no-drill install and puts everything is one convenient, out of the way, location. The voltmeter is inactive until the momentary red switch button is pressed. This preserves every ounce of electricity. The status LED is wired directly to the Redarc BCDC 1225 as per Redarc’s instructions.To chose this new system, select “with voltmeter and status LED” in the configuration dropdown box above.The voltmeter and status LED are included when this option is selected.We sweat the details so you don’t have to.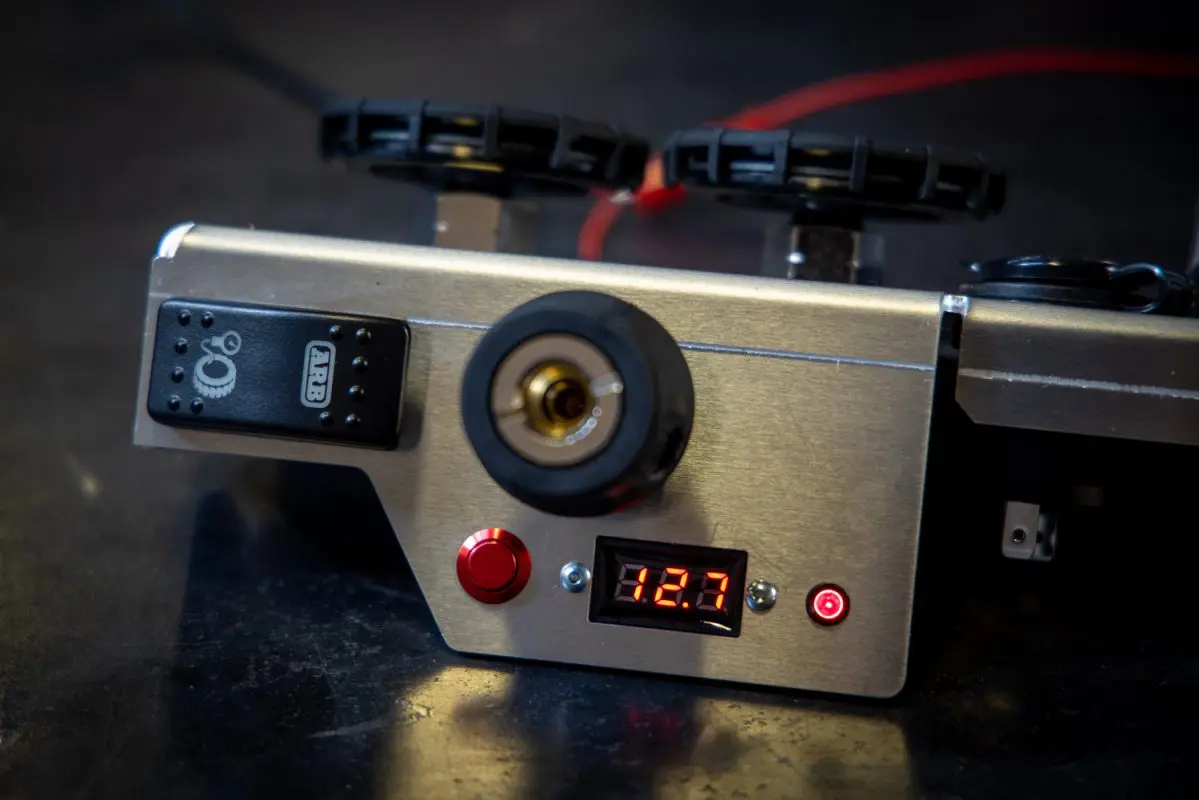
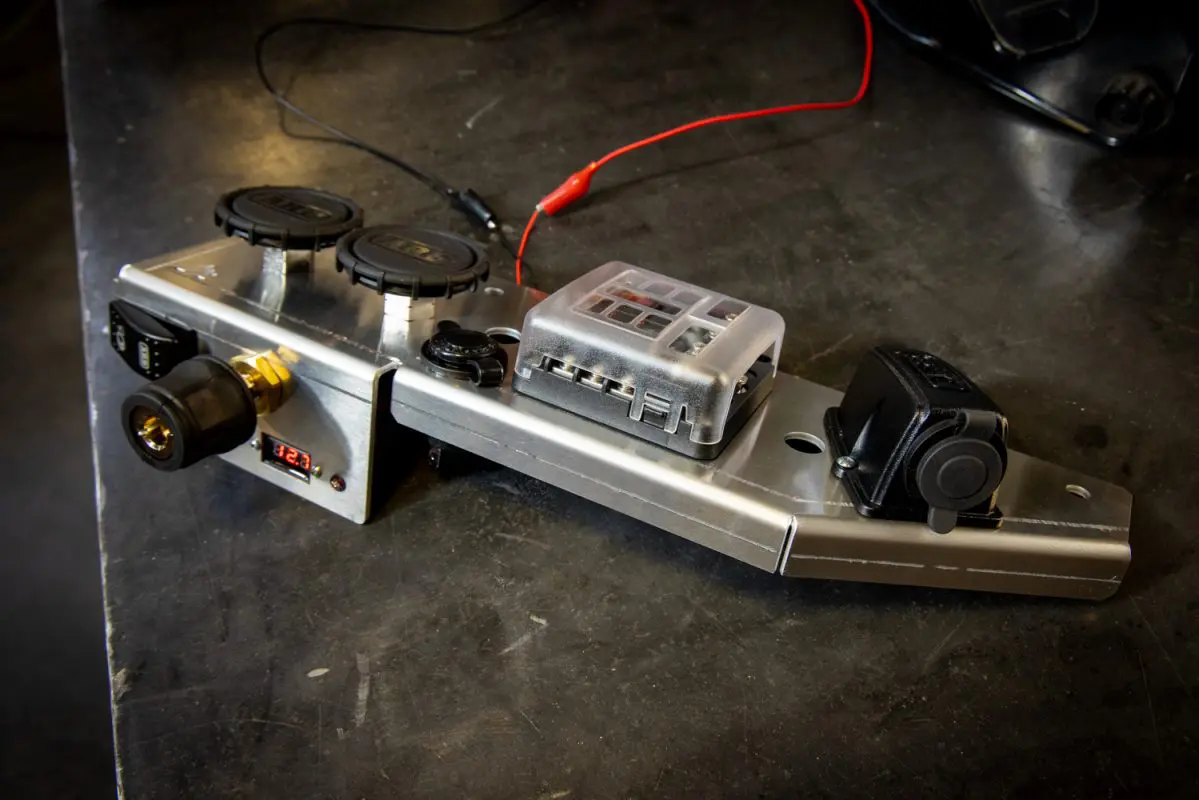

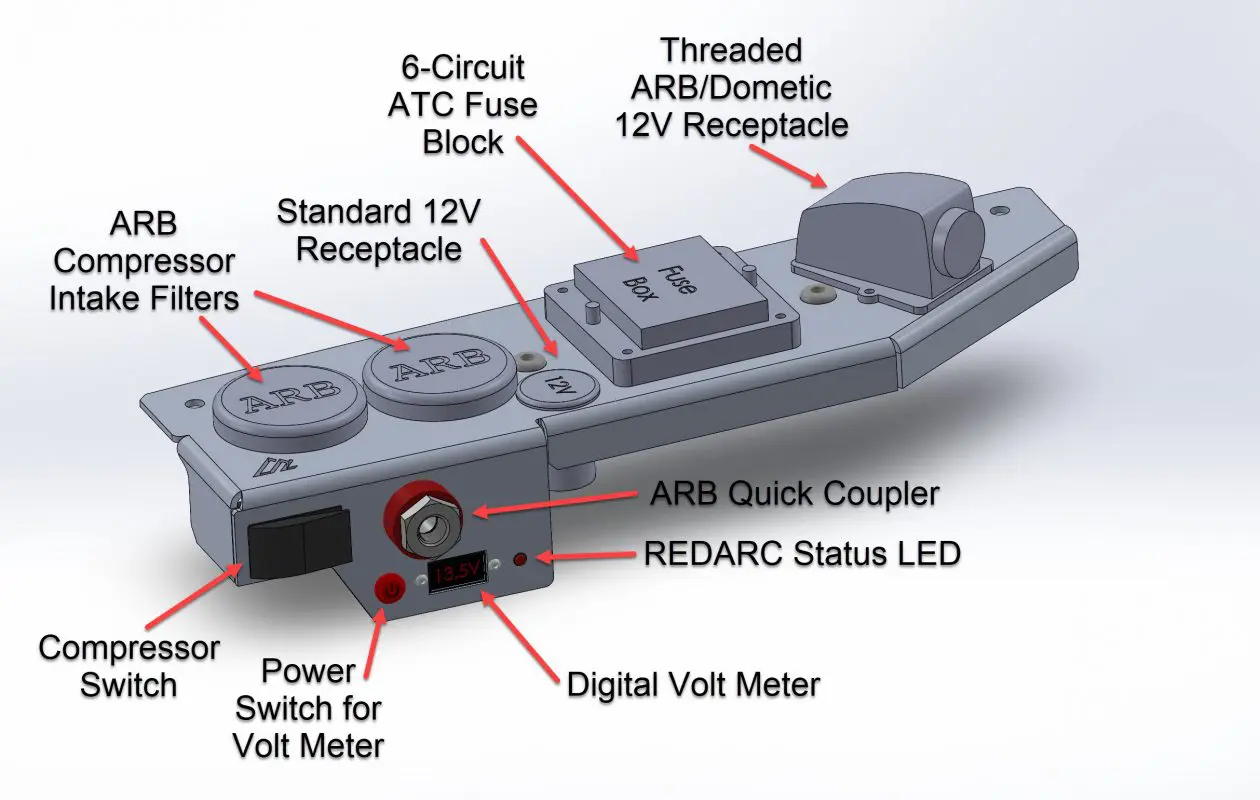
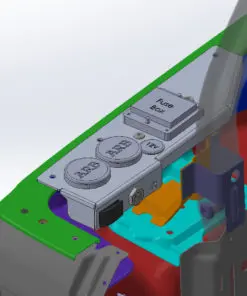
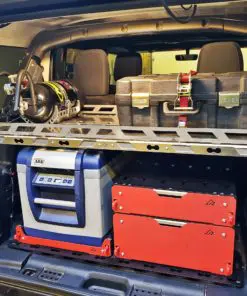
Integrated 6-Way Fuse Box (Optional)
But wait, there’s more!!! (said in my best Billy Mays voice) We also have an optional auxiliary fuse box that can be mounted to the remote bracket. If you are also using our Odyssey PC1100 battery mount, this auxiliary fuse box will be very handy, allowing you to wire in several accessories in one convenient location.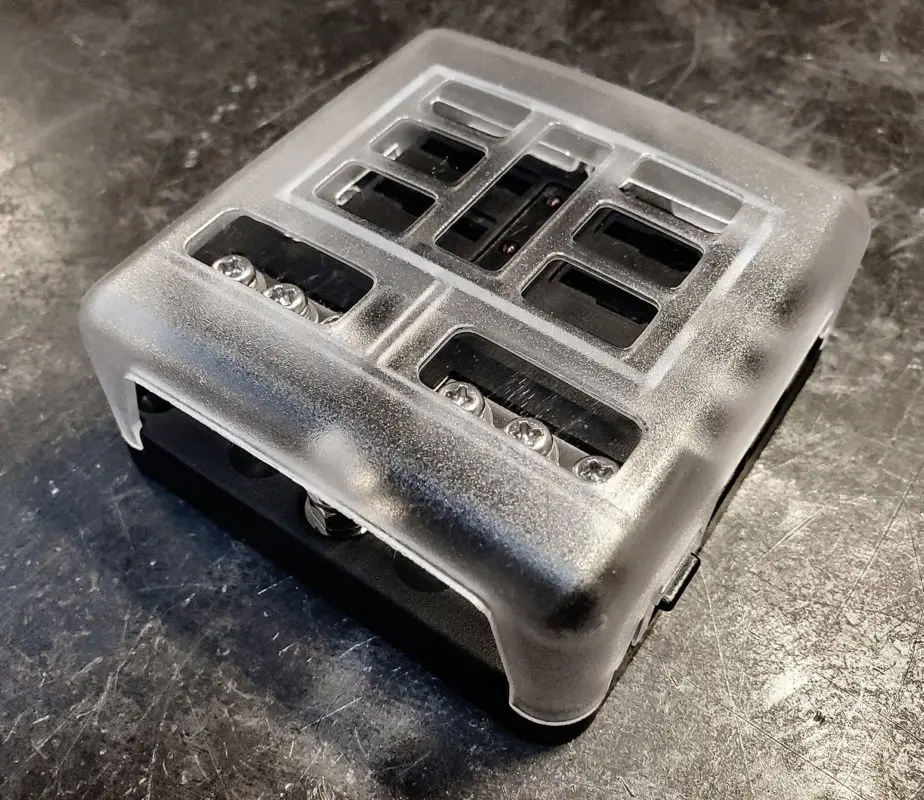
Vertical 12V Receptacle
But wait, there’s more more!!! Also built into the remote bracket is a 12V receptacle mounted vertically. This receptacle is intended for those long fridge cords that protrude into the cargo compartment when they are plugged into the OEM rear auxiliary port. By mounting it vertically, the long end of the cord is not in the way of the cargo area.Be the first to review “Jeep JL ARB Compressor Remote Kit”
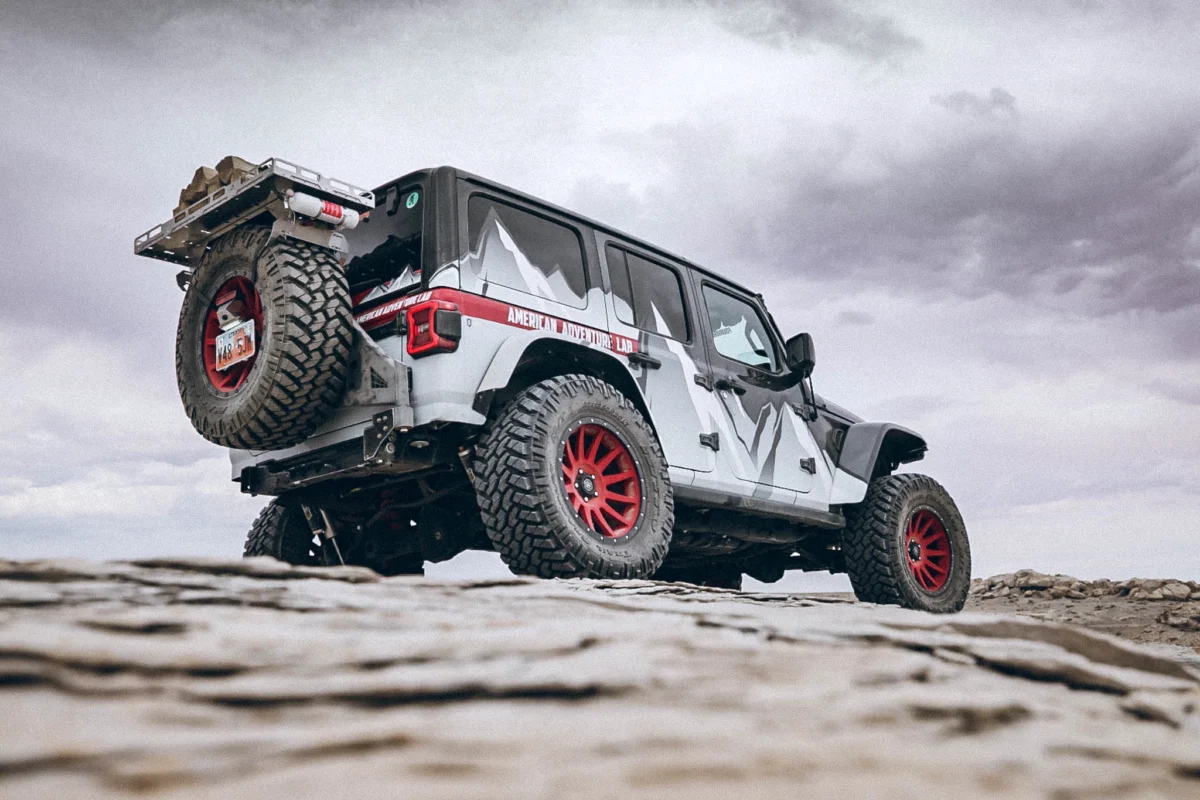
Featured in these Vehicle Builds
Frequently Asked Questions
What is the Remote Kit for?
The main purpose of the Remote Kit is to make sure you can get to all of your compressor controls and again, bring the intake filter to cooler air. This makes it so you should not need to get into the compartment below your cargo area to use your accessories.
Related products
Electrical Components
Price range: $24.95 through $34.95
Electrical Components
$27.99
Electrical Components
$74.95
Electrical Components
Price range: $34.95 through $44.95
Electrical Components
From: $34.95
Reviews
There are no reviews yet.